

When it comes to choosing between two pots that look and function the same way, you will need to understand the differences between them to make the right decision. The two cookware pots we will discuss today are so similar that they are known as cousins in the world of cast iron cookware.
We are talking about Dutch ovens and braisers. So, which is best and why? We will discuss this in the blog below. Keep reading to explore more.
What is a Dutch Oven?
Dutch ovens are the ultimate choice for various dishes, especially stews and casseroles. They are made from thick cast iron and are also available in several colors, sizes, and materials like ceramic and stainless steel. They are covered with a tight lid to retain heat and minimize steam loss.
Moreover, they have a non-stick surface, making them ideal for camp cooking.
What is a Braiser?
The braiser is fondly referred to as “the everyday pot” in several European countries. This is because it is commonly used for daily cooking all around the globe. It is also cast iron and looks almost similar to a Dutch oven. They also sport a tightly sealed lid like their counterpart. You can prepare various dishes in a braiser, such as risotto or lamb shanks.

5 Differences between a Dutch Oven and Braisers
Difference # 1: Uses
You can cook in a Dutch oven using several cooking styles like sautéing, frying, stewing, baking and roasting,
On the other hand, a braiser can also accommodate all cooking styles except deep-frying and stewing, as it has shallow sides.
Difference # 2: Performance
In a Dutch oven, you can stew all kinds of tough cuts of meat and then immerse them in liquid for slow cooking. As a result, you can tender meat that falls off the bone. On the contrary, you can’t fill a braiser with liquid as it has shallow sides, so the result is not as excellent as its counterpart.
Difference # 3: Material
Dutch ovens are prepared using enamel-coated cast iron, while braisers are prepared using enamel-coated cast iron.
Difference # 4: Shape
A Dutch oven is round or oval with high sides, while a braiser is round with low sides.
Difference # 5: Base
Dutch ovens have a flat base and legs as it is used as Camp Kitchen Equipment, while braisers only have a flat abuse and no legs.
Best Cast Iron Dutch Oven for Camping at CampMaid
Check out our range of cast-iron accessories such as charcoal holders, collapsible charcoal chimneys, kickstands, heat-resistant gloves, portable charcoal grills for camping, lid lifters, and more. You can also order separate Dutch ovens or complete Dutch oven sets to make your next camping trip easier.
Get yourself CampMaid’s Explore Adventure Planner to plan for your solo camping trip and ensure nothing is left behind.
You can reach out to place an order! Also, follow us on our Instagram, Facebook, or YouTube channel to learn more about using CampMaid equipment.
When it comes to choosing between two pots that look and function the same way, you will need to understand the differences between them to make the right decision. The two cookware pots we will discuss today are so similar that they are known as cousins in the world of cast iron cookware.
We are talking about Dutch ovens and braisers. So, which is best and why? We will discuss this in the blog below. Keep reading to explore more.
What is a Dutch Oven?
Dutch ovens are the ultimate choice for various dishes, especially stews and casseroles. They are made from thick cast iron and are also available in several colors, sizes, and materials like ceramic and stainless steel. They are covered with a tight lid to retain heat and minimize steam loss.
Moreover, they have a non-stick surface, making them ideal for camp cooking.
What is a Braiser?
The braiser is fondly referred to as “the everyday pot” in several European countries. This is because it is commonly used for daily cooking all around the globe. It is also cast iron and looks almost similar to a Dutch oven. They also sport a tightly sealed lid like their counterpart. You can prepare various dishes in a braiser, such as risotto or lamb shanks.
5 Differences between a Dutch Oven and Braisers
Difference # 1: Uses
You can cook in a Dutch oven using several cooking styles like sautéing, frying, stewing, baking and roasting,
On the other hand, a braiser can also accommodate all cooking styles except deep-frying and stewing, as it has shallow sides.
Difference # 2: Performance
In a Dutch oven, you can stew all kinds of tough cuts of meat and then immerse them in liquid for slow cooking. As a result, you can tender meat that falls off the bone. On the contrary, you can’t fill a braiser with liquid as it has shallow sides, so the result is not as excellent as its counterpart.
Difference # 3: Material
Dutch ovens are prepared using enamel-coated cast iron, while braisers are prepared using enamel-coated cast iron.
Difference # 4: Shape
A Dutch oven is round or oval with high sides, while a braiser is round with low sides.
Difference # 5: Base
Dutch ovens have a flat base and legs as it is used as Camp Kitchen Equipment, while braisers only have a flat abuse and no legs.
Best Cast Iron Dutch Oven for Camping at CampMaid
Check out our range of cast-iron accessories such as charcoal holders, collapsible charcoal chimneys, kickstands, heat-resistant gloves, portable charcoal grills for camping, lid lifters, and more. You can also order separate Dutch ovens or complete Dutch oven sets to make your next camping trip easier.
Get yourself CampMaid’s Explore Adventure Planner to plan for your solo camping trip and ensure nothing is left behind.
You can reach out to place an order! Also, follow us on our Instagram, Facebook, or YouTube channel to learn more about using CampMaid equipment.
5 Differences between a Dutch Oven and Braisers
Confused about buying a Dutch oven or braisers for your next trip? Here are some differences between both to help you decide.

There is no better meat than the one that you eat fresh off the grill. It’s crispy, juicy, and packed with flavor. Cooking meat on a charcoal grill is an art and science in itself. You need skill, technique, and patience to get that exquisite result.
But how do you deal with the fiery charcoals after the party is over? Well, we have got you covered. The experts at CampMaid have put together a list of tried and tested ways to put out the lit charcoals in no time.
Grilling on a charcoal grill is undoubtedly one of the most authentic ways to cook your meat and get the most flavor. However, many assume putting out the coals is a very challenging task, but in reality, it is very easy. You just need to follow the right technique, and you are good to go.
Keep reading this blog to explore ways to put out charcoal after grilling.
Supplies to Put Out Charcoal After Grilling
- Heat proof gloves
- Water
- Metal spatula
- Aluminum foil
- Wire brush
- Grill tongs
- Fire extinguisher
- Baking soda
3 Steps to Put Out Charcoal After Grilling
Step # 1: Cool the Grill
There are two ways to cool down the charcoal grill. You can go slow or wait a whole forty-eight hours, or you can get the job done in a matter of minutes. Cooling down the coal is essential to minimize risks.
The first method is simple; close the lid of the charcoal grill and let the coals sit for two days. On the other hand, you can use water to cool down the charcoal if you are short on time. However, pouring water on lit colas will generate a lot of steam, so you need to be cautious. Make sure you go slowly to stay safe.
Step # 2: Get Rid of the Ash and Charcoal
Once you are done with the first step, you can dispose of the ash and remaining charcoal. Wrap the waste in aluminum foil for proper disposal.
Step # 3: Clean the Charcoal Grill
Grab your tools and get ready to scrub the grill. First, clean it using water, and after you have gotten rid of the grime, you can use soap for another wash.

Pro Tip: Re-Use Partly Burned Coals
If you see some coals that can be reused for another grilling session, separate them before you pour water to cool down the charcoals.
You can cool them down by spraying them with water so they can be lit again.
Shop at CampMaid – Your Ultimate camping Partner
If you are looking for a reliable Charcoal Holder & Cast Iron Grill Accessories, CampMaid is your best bet. Follow us on our YouTube channel and get the best breakfast recipes.
So what are you waiting for? Contact us to learn more about our offerings.
There is no better meat than the one that you eat fresh off the grill. It’s crispy, juicy, and packed with flavor. Cooking meat on a charcoal grill is an art and science in itself. You need skill, technique, and patience to get that exquisite result.
But how do you deal with the fiery charcoals after the party is over? Well, we have got you covered. The experts at CampMaid have put together a list of tried and tested ways to put out the lit charcoals in no time.
Grilling on a charcoal grill is undoubtedly one of the most authentic ways to cook your meat and get the most flavor. However, many assume putting out the coals is a very challenging task, but in reality, it is very easy. You just need to follow the right technique, and you are good to go.
Keep reading this blog to explore ways to put out charcoal after grilling.
Supplies to Put Out Charcoal After Grilling
- Heat proof gloves
- Water
- Metal spatula
- Aluminum foil
- Wire brush
- Grill tongs
- Fire extinguisher
- Baking soda
3 Steps to Put Out Charcoal After Grilling
Step # 1: Cool the Grill
There are two ways to cool down the charcoal grill. You can go slow or wait a whole forty-eight hours, or you can get the job done in a matter of minutes. Cooling down the coal is essential to minimize risks.
The first method is simple; close the lid of the charcoal grill and let the coals sit for two days. On the other hand, you can use water to cool down the charcoal if you are short on time. However, pouring water on lit colas will generate a lot of steam, so you need to be cautious. Make sure you go slowly to stay safe.
Step # 2: Get Rid of the Ash and Charcoal
Once you are done with the first step, you can dispose of the ash and remaining charcoal. Wrap the waste in aluminum foil for proper disposal.
Step # 3: Clean the Charcoal Grill
Grab your tools and get ready to scrub the grill. First, clean it using water, and after you have gotten rid of the grime, you can use soap for another wash.
Pro Tip: Re-Use Partly Burned Coals
If you see some coals that can be reused for another grilling session, separate them before you pour water to cool down the charcoals.
You can cool them down by spraying them with water so they can be lit again.
Shop at CampMaid – Your Ultimate camping Partner
If you are looking for a reliable Charcoal Holder & Cast Iron Grill Accessories, CampMaid is your best bet. Follow us on our YouTube channel and get the best breakfast recipes.
So what are you waiting for? Contact us to learn more about our offerings.
How to Put Out Charcoal after Grilling?
Eating freshly grilled meat is a must during camping. Here are some ways to put out your charcoal grill.
Cast iron cookware is highly popular and widely used. It’s one of the most versatile camp cooking equipment with amazing durability and resilience. The food cooked in cast iron cookware tastes exceptional, and although it’s a little sturdy, you can easily transport it if you pack and store it correctly.
Most people assume they can’t take cast iron cookware on their camping trips because they are difficult to carry. However, the trick lies in the way you pack and store them. To help you get the most out of your camp cooking experience, let’s take a look at some detailed ways you should pack and store your cast iron accessories and other cookware. Keep reading to find out.
How to Pack and Store Cast Iron Cookware for Camping – Explained!
How to Pack Cast Iron Cookware for Camping?
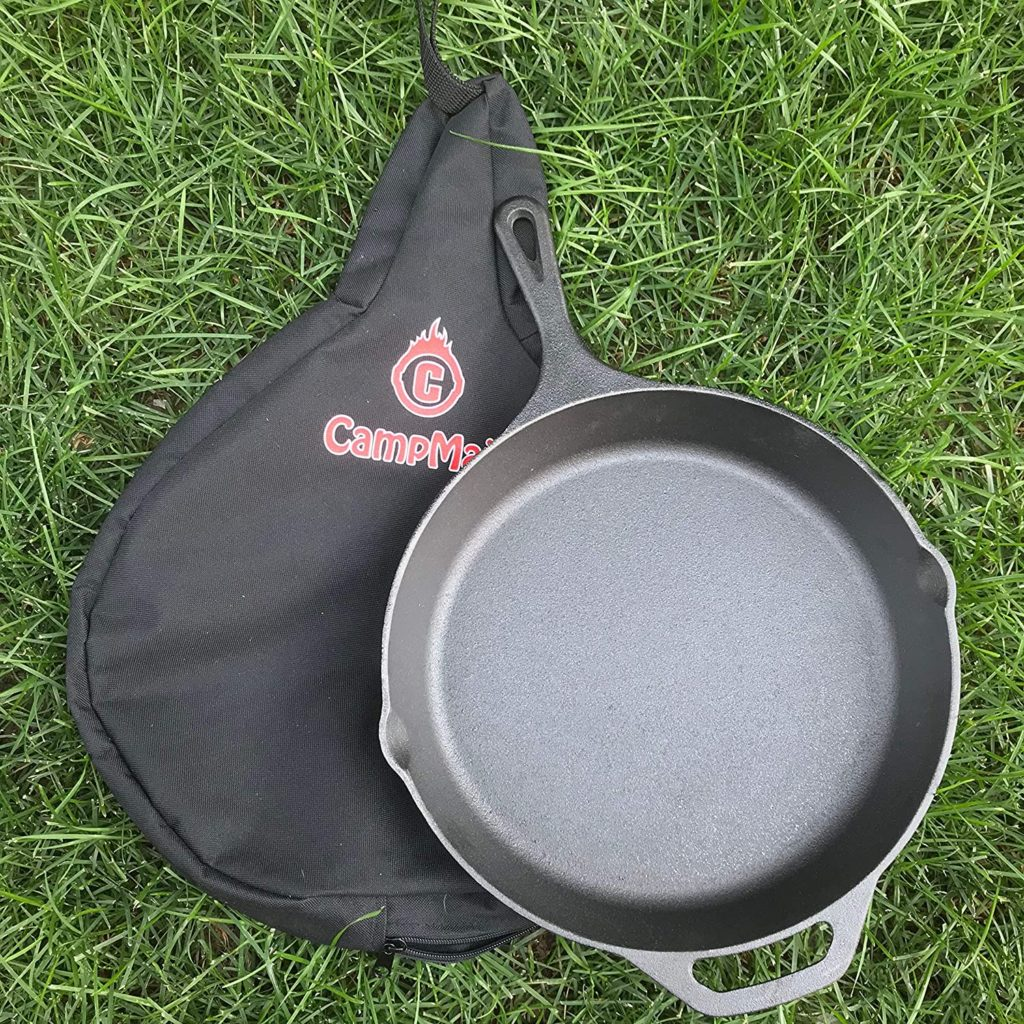
Before you head out for your camping trip, ensure that you pack up your cast iron pans and accessories safely and correctly. Start by wrapping the cookware in old towels or pillowcases. You can also use paper bags to wrap them and use paper towels as padding in between.
Get yourself a cast iron pot and pan-carrying bag for ease of movement. You can also pack them in a wooden or plastic box for easy transit.
How to Store Cast Iron Cookware for Camping?
Although cast iron cookware is durable and robust, you still need to care for them and maintain them to ensure they stay that way, and this includes the time they are stored. Some elements can cause serious harm to them.
Here are some tips to ensure the proper storage of your cast iron cookware:
- Store the pots and lids separately
- Ensure the cast iron accessoriesare clean and dry before putting them in a storage box
- Season the pansand pots before storing them
- Ensure the place you are storing the cookware is dry (to prevent rusting)

Final Thoughts
Packing and storing your cast iron cookware plays a significant role in prolonging its service life. It also ensures there is no damage to your cast iron accessories, and they remain in optimal condition.
Best Cast Iron Dutch Oven for Camping at CampMaid
Check out our range of cast-iron accessories such as charcoal holders, collapsible charcoal chimneys, kickstands, heat-resistant gloves, portable charcoal grills for camping, and lid lifters. You can also order separate Dutch ovens or complete Dutch oven sets to make your next camping trip easier.
Get yourself CampMaid’s Explore Adventure Planner to plan for your solo camping trip and ensure nothing is left behind.
You can reach out to place an order! Also, follow us on our Instagram, Facebook, or YouTube channel to learn more about using CampMaid equipment.
Cast iron cookware is highly popular and widely used. It’s one of the most versatile camp cooking equipment with amazing durability and resilience. The food cooked in cast iron cookware tastes exceptional, and although it’s a little sturdy, you can easily transport it if you pack and store it correctly.
Most people assume they can’t take cast iron cookware on their camping trips because they are difficult to carry. However, the trick lies in the way you pack and store them. To help you get the most out of your camp cooking experience, let’s take a look at some detailed ways you should pack and store your cast iron accessories and other cookware. Keep reading to find out.
How to Pack and Store Cast Iron Cookware for Camping – Explained!
How to Pack Cast Iron Cookware for Camping?
Before you head out for your camping trip, ensure that you pack up your cast iron pans and accessories safely and correctly. Start by wrapping the cookware in old towels or pillowcases. You can also use paper bags to wrap them and use paper towels as padding in between.
Get yourself a cast iron pot and pan-carrying bag for ease of movement. You can also pack them in a wooden or plastic box for easy transit.
How to Store Cast Iron Cookware for Camping?
Although cast iron cookware is durable and robust, you still need to care for them and maintain them to ensure they stay that way, and this includes the time they are stored. Some elements can cause serious harm to them.
Here are some tips to ensure the proper storage of your cast iron cookware:
- Store the pots and lids separately
- Ensure the cast iron accessoriesare clean and dry before putting them in a storage box
- Season the pansand pots before storing them
- Ensure the place you are storing the cookware is dry (to prevent rusting)
Final Thoughts
Packing and storing your cast iron cookware plays a significant role in prolonging its service life. It also ensures there is no damage to your cast iron accessories, and they remain in optimal condition.
Best Cast Iron Dutch Oven for Camping at CampMaid
Check out our range of cast-iron accessories such as charcoal holders, collapsible charcoal chimneys, kickstands, heat-resistant gloves, portable charcoal grills for camping, and lid lifters. You can also order separate Dutch ovens or complete Dutch oven sets to make your next camping trip easier.
Get yourself CampMaid’s Explore Adventure Planner to plan for your solo camping trip and ensure nothing is left behind.
You can reach out to place an order! Also, follow us on our Instagram, Facebook, or YouTube channel to learn more about using CampMaid equipment.
How to Pack and Store Cast Iron Cookware for Camping?
Cast iron accessories are essential for a successful camp cooking experience. Here’s a guide to help you pack and store them.

You might find it a little hard to light a charcoal grill at first, but it will be worth the time and effort once you get the hang of it. You will be able to cook and experiment with different ingredients and flavors, which is usually the case when you are on a camping trip.
Cooking meat on a charcoal grill will give it that smoky flavor and crispy, juicy texture, which is delicious even if it is a little more work. However, learning to light a charcoal grill is not as easy as it sounds. You will need to make extra effort to master the techniques and use some tips and tricks to make it work.
Therefore, before you start making your favorite steak or burger, you should know how to light a grill. The experts at CampMaid know this can sound a little daunting at first, especially to newbie campers, but with some guidance, you can ace the skill in no time.
This blog will list and explain some ways to get your charcoal grill sizzling hot in no time. Keep reading to learn more.
3 Ways to Start a Charcoal Grill
Way # 1: Using a Lighter Fluid
This is one of the most common methods, and many campers are familiar with it. Start by arranging the charcoal correctly. Make sure you don’t scatter it around. Instead, stack the coal in a pyramid or mound shape.
Then, squirt the lighter fluid all over the coals, concentrating more towards the center. The ideal way to measure the fluid is using three tablespoons per charcoal pound. Also, never make the mistake of pouring lighter fluid over a live fire.
Once you have poured the fluid, quickly use a long grill lighter to light the fire.
Way # 2: Using a Chimney Starter
A chimney starter is a cylindrical metal device. It concentrates the charcoal’s heat, feeding the fire. Although you will need to buy additional Camp Kitchen Equipment, you can get your grill red hot in no time with this method.

Way # 3: Using a Heat Gun
Although it is far from the conventional methods, it is the fastest (and coolest) method by far. You start by arranging the coals and concrete with the heat gun at the center. After a minute, you will see a red glow, indicating the coals have ignited.
Find the Best Charcoal Holder and Cast Iron Grill Accessories at CampMaid
Looking for the best grills for camping? CampMaid has got you covered! We’re an online store based in Utah, U.S., that sells cast iron camping sets such as our high-quality Dutch oven tools set that includes a Dutch oven stand and lid lifter. You can find all kinds of innovative camp kitchen equipment on our website! You can also find great recipes and reviews on our YouTube channel.
So what are you waiting for? Contact us for more details today. Alternatively, you can visit our website to place your order.
You might find it a little hard to light a charcoal grill at first, but it will be worth the time and effort once you get the hang of it. You will be able to cook and experiment with different ingredients and flavors, which is usually the case when you are on a camping trip.
Cooking meat on a charcoal grill will give it that smoky flavor and crispy, juicy texture, which is delicious even if it is a little more work. However, learning to light a charcoal grill is not as easy as it sounds. You will need to make extra effort to master the techniques and use some tips and tricks to make it work.
Therefore, before you start making your favorite steak or burger, you should know how to light a grill. The experts at CampMaid know this can sound a little daunting at first, especially to newbie campers, but with some guidance, you can ace the skill in no time.
This blog will list and explain some ways to get your charcoal grill sizzling hot in no time. Keep reading to learn more.
3 Ways to Start a Charcoal Grill
Way # 1: Using a Lighter Fluid
This is one of the most common methods, and many campers are familiar with it. Start by arranging the charcoal correctly. Make sure you don’t scatter it around. Instead, stack the coal in a pyramid or mound shape.
Then, squirt the lighter fluid all over the coals, concentrating more towards the center. The ideal way to measure the fluid is using three tablespoons per charcoal pound. Also, never make the mistake of pouring lighter fluid over a live fire.
Once you have poured the fluid, quickly use a long grill lighter to light the fire.
Way # 2: Using a Chimney Starter
A chimney starter is a cylindrical metal device. It concentrates the charcoal’s heat, feeding the fire. Although you will need to buy additional Camp Kitchen Equipment, you can get your grill red hot in no time with this method.
Way # 3: Using a Heat Gun
Although it is far from the conventional methods, it is the fastest (and coolest) method by far. You start by arranging the coals and concrete with the heat gun at the center. After a minute, you will see a red glow, indicating the coals have ignited.
Find the Best Charcoal Holder and Cast Iron Grill Accessories at CampMaid
Looking for the best grills for camping? CampMaid has got you covered! We’re an online store based in Utah, U.S., that sells cast iron camping sets such as our high-quality Dutch oven tools set that includes a Dutch oven stand and lid lifter. You can find all kinds of innovative camp kitchen equipment on our website! You can also find great recipes and reviews on our YouTube channel.
So what are you waiting for? Contact us for more details today. Alternatively, you can visit our website to place your order.
Fire Up: 3 Ways to Start a Charcoal Grill
First time using a charcoal grill? We have got you covered! Here are some ways to get you started.

Dutch oven cooking is a technique that many people enjoy using because of its great results. This versatile cooking tool can be used for various cooking tasks. Its popularity is likely because it produces delicious dishes while retaining the nutrition and flavor of the fresh ingredients it is cooked with. This makes it a great option for busy families who want to eat healthy meals without spending a lot of time in the kitchen or for people who want to eat healthy on a camping or hiking trip without carrying heavy, bulky equipment.
Because cast iron Dutch ovens are such a useful and versatile piece of equipment, it is important to know how to use one properly to get the best results from your cooking. Read on for tips to help you make the most of your Dutch oven.
Choose the Right Dutch Oven For Your Needs
The first thing you need to decide when choosing a Dutch oven is what type you want. A round cast iron Dutch oven is great for basic cooking tasks and small meals. They're ideal for cooking and heating casseroles, stews, and other dishes that take a long time to cook and require some liquid to simmer. However, if you need your Dutch oven to accommodate larger quantities or different types of food, you may want to opt for a rectangular oven.
Cook Slowly on Low Flame
One of the biggest mistakes you can make when using a Dutch oven is overcooking your food. Slow cooking on low heat is the key to producing perfectly cooked food and tender meat when using this cooking method. Make sure to use the lid to cover the pot when cooking, as it will trap moisture, and your food will not dry out.
Feel Free to Use the Oven
Many people hesitate to use a regular oven when cooking with a Dutch oven. For long simmer dishes, you can transfer the Dutch oven to the oven to cook it gently over low heat and let it simmer until you're ready to serve your meal. It will make the meal more flavorful and tender.
Use Broth Instead of Water
Some recipes call for a large amount of water to be used in the cooking process, but this will make your food more watery and less flavorful. Instead, add a flavorful liquid to the dish to give it a better taste and extra moisture. Chicken broth is a great substitute for water in this recipe, and it will add plenty of flavor to your food.

At CampMaid, you can find a variety of camping cooking equipment, including a lodge lid lifter, portable charcoal grills, collapsible charcoal chimney, charcoal holder, cast-iron grill Dutch oven sets, kickstands, accessories, and more
Connect with us to learn more about our top sellers! You can also follow us on our Instagram, Facebook, or YouTube channel to stay updated about our innovative outdoor cooking solutions.
Dutch oven cooking is a technique that many people enjoy using because of its great results. This versatile cooking tool can be used for various cooking tasks. Its popularity is likely because it produces delicious dishes while retaining the nutrition and flavor of the fresh ingredients it is cooked with. This makes it a great option for busy families who want to eat healthy meals without spending a lot of time in the kitchen or for people who want to eat healthy on a camping or hiking trip without carrying heavy, bulky equipment.
Because cast iron Dutch ovens are such a useful and versatile piece of equipment, it is important to know how to use one properly to get the best results from your cooking. Read on for tips to help you make the most of your Dutch oven.
Choose the Right Dutch Oven For Your Needs
The first thing you need to decide when choosing a Dutch oven is what type you want. A round cast iron Dutch oven is great for basic cooking tasks and small meals. They're ideal for cooking and heating casseroles, stews, and other dishes that take a long time to cook and require some liquid to simmer. However, if you need your Dutch oven to accommodate larger quantities or different types of food, you may want to opt for a rectangular oven.
Cook Slowly on Low Flame
One of the biggest mistakes you can make when using a Dutch oven is overcooking your food. Slow cooking on low heat is the key to producing perfectly cooked food and tender meat when using this cooking method. Make sure to use the lid to cover the pot when cooking, as it will trap moisture, and your food will not dry out.
Feel Free to Use the Oven
Many people hesitate to use a regular oven when cooking with a Dutch oven. For long simmer dishes, you can transfer the Dutch oven to the oven to cook it gently over low heat and let it simmer until you're ready to serve your meal. It will make the meal more flavorful and tender.
Use Broth Instead of Water
Some recipes call for a large amount of water to be used in the cooking process, but this will make your food more watery and less flavorful. Instead, add a flavorful liquid to the dish to give it a better taste and extra moisture. Chicken broth is a great substitute for water in this recipe, and it will add plenty of flavor to your food.
At CampMaid, you can find a variety of camping cooking equipment, including a lodge lid lifter, portable charcoal grills, collapsible charcoal chimney, charcoal holder, cast-iron grill Dutch oven sets, kickstands, accessories, and more
Connect with us to learn more about our top sellers! You can also follow us on our Instagram, Facebook, or YouTube channel to stay updated about our innovative outdoor cooking solutions.
4 Tips for Using a Dutch Oven to get the Best Results
Dutch ovens are versatile and can be used on camping trips as well. Here’s how to get the best results with Dutch ovens.

One thing most campers are commonly concerned about is smart packing.

How To Save Space When Packing For Camping

Outdoor cooking is an essential part of every camping trip.

Foolproof Ways To Keep Your To Keep Your Camp Kitchen Clean

Going on a camping trip soon? Camping is a fun activity for many. More than 8 million people went camping in 2021. Households in the US are always looking for fun outdoor adventures.
If you’re stressed about your upcoming camping trip, we are here to help you. Our hacks will make your camping packing, meals, and activities much easier. Make sure to check out CampMaid for Outdoor Cooking Essentials.
Make Your Own Fire Starters
Making a fire starter will help you save money and time. It’s also a necessary outdoor skill. All you have to do is simply take some paper towels or old paper and tie them to your fire-starting log.
Get Glow Sticks
You can buy glow sticks online and use them for your midnight nature calls. You can tie a glowstick to your tent, and anytime you want to step outside at night, you will have the light from your glow sticks. Plus, the glow sticks also repel critters who might pay a visit.
Baby Wipes For the Win!
Baby wipes are not just for your baby. They are a must for any trip, including a campaign trip. Grab three to four packets, and you can clean just about anything with them. From utensils to your hands and face to your camping gear, they are hygienic, and with one swipe any surface will be instantly clean.

Scavenger Hunt
If you’re going camping with children, a great way to keep them busy is to engage them in an exciting scavenger hunt. This will help keep them distracted while you prepare the campsite. It will also give your kids a little space to explore. Just make sure they don’t wander off too far.
Food Prep
This hack will save you time and keep your campsite mess-free. Prepare your food before your camping trip. You can chop meat and veggies and store them in a mason jar or little baggies. You can also store some snacks in little Ziploc backs, and each individual can carry a bag with them. Make sure you also have some useful outdoor cooking equipment for camping.
Check Out CampMaid
If you’re looking for easy yet delicious camping meals, you can check out our recipes. At CampMaid, we have everything you need. Visit our website today for portable charcoal grills for camping, skillets, collapsible charcoal chimneys, charcoal holders, cast-iron grill accessories, and best dutch oven sets online.
Follow us on Instagram or Facebook to learn more about our upcoming products and exciting offers. Connect with us today as we continue towards our goal of revolutionizing the brilliant world of outdoor cooking equipment.
Going on a camping trip soon? Camping is a fun activity for many. More than 8 million people went camping in 2021. Households in the US are always looking for fun outdoor adventures.
If you’re stressed about your upcoming camping trip, we are here to help you. Our hacks will make your camping packing, meals, and activities much easier. Make sure to check out CampMaid for Outdoor Cooking Essentials.
Make Your Own Fire Starters
Making a fire starter will help you save money and time. It’s also a necessary outdoor skill. All you have to do is simply take some paper towels or old paper and tie them to your fire-starting log.
Get Glow Sticks
You can buy glow sticks online and use them for your midnight nature calls. You can tie a glowstick to your tent, and anytime you want to step outside at night, you will have the light from your glow sticks. Plus, the glow sticks also repel critters who might pay a visit.
Baby Wipes For the Win!
Baby wipes are not just for your baby. They are a must for any trip, including a campaign trip. Grab three to four packets, and you can clean just about anything with them. From utensils to your hands and face to your camping gear, they are hygienic, and with one swipe any surface will be instantly clean.
Scavenger Hunt
If you’re going camping with children, a great way to keep them busy is to engage them in an exciting scavenger hunt. This will help keep them distracted while you prepare the campsite. It will also give your kids a little space to explore. Just make sure they don’t wander off too far.
Food Prep
This hack will save you time and keep your campsite mess-free. Prepare your food before your camping trip. You can chop meat and veggies and store them in a mason jar or little baggies. You can also store some snacks in little Ziploc backs, and each individual can carry a bag with them. Make sure you also have some useful outdoor cooking equipment for camping.
Check Out CampMaid
If you’re looking for easy yet delicious camping meals, you can check out our recipes. At CampMaid, we have everything you need. Visit our website today for portable charcoal grills for camping, skillets, collapsible charcoal chimneys, charcoal holders, cast-iron grill accessories, and best dutch oven sets online.
Follow us on Instagram or Facebook to learn more about our upcoming products and exciting offers. Connect with us today as we continue towards our goal of revolutionizing the brilliant world of outdoor cooking equipment.
Useful Camping Hacks Campers need to Know
Worried about your camping trip? Check out this guide to learn some useful hacks and visit CampMaid for Outdoor Cooking Essentials.
+Recent Articles
- 5 Differences between a Dutch Oven and Braisers
- Heat proof gloves
- Water
- Metal spatula
- Aluminum foil
- Wire brush
- Grill tongs
- Fire extinguisher
- Baking soda
- How to Put Out Charcoal after Grilling?
- Store the pots and lids separately
- Ensure the cast iron accessoriesare clean and dry before putting them in a storage box
- Season the pansand pots before storing them
- Ensure the place you are storing the cookware is dry (to prevent rusting)
- How to Pack and Store Cast Iron Cookware for Camping?
- Fire Up: 3 Ways to Start a Charcoal Grill
- 4 Tips for Using a Dutch Oven to get the Best Results
- How To Save Space When Packing For Camping
- Foolproof Ways To Keep Your To Keep Your Camp Kitchen Clean
- Useful Camping Hacks Campers need to Know
When it comes to choosing between two pots that look and function the same way, you will need to understand the differences between them to make the right decision. The two cookware pots we will discuss today are so similar that they are known as cousins in the world of cast iron cookware.
We are talking about Dutch ovens and braisers. So, which is best and why? We will discuss this in the blog below. Keep reading to explore more.
What is a Dutch Oven?
Dutch ovens are the ultimate choice for various dishes, especially stews and casseroles. They are made from thick cast iron and are also available in several colors, sizes, and materials like ceramic and stainless steel. They are covered with a tight lid to retain heat and minimize steam loss.
Moreover, they have a non-stick surface, making them ideal for camp cooking.
What is a Braiser?
The braiser is fondly referred to as “the everyday pot” in several European countries. This is because it is commonly used for daily cooking all around the globe. It is also cast iron and looks almost similar to a Dutch oven. They also sport a tightly sealed lid like their counterpart. You can prepare various dishes in a braiser, such as risotto or lamb shanks.
5 Differences between a Dutch Oven and Braisers
Difference # 1: Uses
You can cook in a Dutch oven using several cooking styles like sautéing, frying, stewing, baking and roasting,
On the other hand, a braiser can also accommodate all cooking styles except deep-frying and stewing, as it has shallow sides.
Difference # 2: Performance
In a Dutch oven, you can stew all kinds of tough cuts of meat and then immerse them in liquid for slow cooking. As a result, you can tender meat that falls off the bone. On the contrary, you can’t fill a braiser with liquid as it has shallow sides, so the result is not as excellent as its counterpart.
Difference # 3: Material
Dutch ovens are prepared using enamel-coated cast iron, while braisers are prepared using enamel-coated cast iron.
Difference # 4: Shape
A Dutch oven is round or oval with high sides, while a braiser is round with low sides.
Difference # 5: Base
Dutch ovens have a flat base and legs as it is used as Camp Kitchen Equipment, while braisers only have a flat abuse and no legs.
Best Cast Iron Dutch Oven for Camping at CampMaid
Check out our range of cast-iron accessories such as charcoal holders, collapsible charcoal chimneys, kickstands, heat-resistant gloves, portable charcoal grills for camping, lid lifters, and more. You can also order separate Dutch ovens or complete Dutch oven sets to make your next camping trip easier.
Get yourself CampMaid’s Explore Adventure Planner to plan for your solo camping trip and ensure nothing is left behind.
You can reach out to place an order! Also, follow us on our Instagram, Facebook, or YouTube channel to learn more about using CampMaid equipment.
There is no better meat than the one that you eat fresh off the grill. It’s crispy, juicy, and packed with flavor. Cooking meat on a charcoal grill is an art and science in itself. You need skill, technique, and patience to get that exquisite result.
But how do you deal with the fiery charcoals after the party is over? Well, we have got you covered. The experts at CampMaid have put together a list of tried and tested ways to put out the lit charcoals in no time.
Grilling on a charcoal grill is undoubtedly one of the most authentic ways to cook your meat and get the most flavor. However, many assume putting out the coals is a very challenging task, but in reality, it is very easy. You just need to follow the right technique, and you are good to go.
Keep reading this blog to explore ways to put out charcoal after grilling.
Supplies to Put Out Charcoal After Grilling
3 Steps to Put Out Charcoal After Grilling
Step # 1: Cool the Grill
There are two ways to cool down the charcoal grill. You can go slow or wait a whole forty-eight hours, or you can get the job done in a matter of minutes. Cooling down the coal is essential to minimize risks.
The first method is simple; close the lid of the charcoal grill and let the coals sit for two days. On the other hand, you can use water to cool down the charcoal if you are short on time. However, pouring water on lit colas will generate a lot of steam, so you need to be cautious. Make sure you go slowly to stay safe.
Step # 2: Get Rid of the Ash and Charcoal
Once you are done with the first step, you can dispose of the ash and remaining charcoal. Wrap the waste in aluminum foil for proper disposal.
Step # 3: Clean the Charcoal Grill
Grab your tools and get ready to scrub the grill. First, clean it using water, and after you have gotten rid of the grime, you can use soap for another wash.
Pro Tip: Re-Use Partly Burned Coals
If you see some coals that can be reused for another grilling session, separate them before you pour water to cool down the charcoals.
You can cool them down by spraying them with water so they can be lit again.
Shop at CampMaid – Your Ultimate camping Partner
If you are looking for a reliable Charcoal Holder & Cast Iron Grill Accessories, CampMaid is your best bet. Follow us on our YouTube channel and get the best breakfast recipes.
So what are you waiting for? Contact us to learn more about our offerings.
Cast iron cookware is highly popular and widely used. It’s one of the most versatile camp cooking equipment with amazing durability and resilience. The food cooked in cast iron cookware tastes exceptional, and although it’s a little sturdy, you can easily transport it if you pack and store it correctly.
Most people assume they can’t take cast iron cookware on their camping trips because they are difficult to carry. However, the trick lies in the way you pack and store them. To help you get the most out of your camp cooking experience, let’s take a look at some detailed ways you should pack and store your cast iron accessories and other cookware. Keep reading to find out.
How to Pack and Store Cast Iron Cookware for Camping – Explained!
How to Pack Cast Iron Cookware for Camping?
Before you head out for your camping trip, ensure that you pack up your cast iron pans and accessories safely and correctly. Start by wrapping the cookware in old towels or pillowcases. You can also use paper bags to wrap them and use paper towels as padding in between.
Get yourself a cast iron pot and pan-carrying bag for ease of movement. You can also pack them in a wooden or plastic box for easy transit.
How to Store Cast Iron Cookware for Camping?
Although cast iron cookware is durable and robust, you still need to care for them and maintain them to ensure they stay that way, and this includes the time they are stored. Some elements can cause serious harm to them.
Here are some tips to ensure the proper storage of your cast iron cookware:
Final Thoughts
Packing and storing your cast iron cookware plays a significant role in prolonging its service life. It also ensures there is no damage to your cast iron accessories, and they remain in optimal condition.
Best Cast Iron Dutch Oven for Camping at CampMaid
Check out our range of cast-iron accessories such as charcoal holders, collapsible charcoal chimneys, kickstands, heat-resistant gloves, portable charcoal grills for camping, and lid lifters. You can also order separate Dutch ovens or complete Dutch oven sets to make your next camping trip easier.
Get yourself CampMaid’s Explore Adventure Planner to plan for your solo camping trip and ensure nothing is left behind.
You can reach out to place an order! Also, follow us on our Instagram, Facebook, or YouTube channel to learn more about using CampMaid equipment.
You might find it a little hard to light a charcoal grill at first, but it will be worth the time and effort once you get the hang of it. You will be able to cook and experiment with different ingredients and flavors, which is usually the case when you are on a camping trip.
Cooking meat on a charcoal grill will give it that smoky flavor and crispy, juicy texture, which is delicious even if it is a little more work. However, learning to light a charcoal grill is not as easy as it sounds. You will need to make extra effort to master the techniques and use some tips and tricks to make it work.
Therefore, before you start making your favorite steak or burger, you should know how to light a grill. The experts at CampMaid know this can sound a little daunting at first, especially to newbie campers, but with some guidance, you can ace the skill in no time.
This blog will list and explain some ways to get your charcoal grill sizzling hot in no time. Keep reading to learn more.
3 Ways to Start a Charcoal Grill
Way # 1: Using a Lighter Fluid
This is one of the most common methods, and many campers are familiar with it. Start by arranging the charcoal correctly. Make sure you don’t scatter it around. Instead, stack the coal in a pyramid or mound shape.
Then, squirt the lighter fluid all over the coals, concentrating more towards the center. The ideal way to measure the fluid is using three tablespoons per charcoal pound. Also, never make the mistake of pouring lighter fluid over a live fire.
Once you have poured the fluid, quickly use a long grill lighter to light the fire.
Way # 2: Using a Chimney Starter
A chimney starter is a cylindrical metal device. It concentrates the charcoal’s heat, feeding the fire. Although you will need to buy additional Camp Kitchen Equipment, you can get your grill red hot in no time with this method.
Way # 3: Using a Heat Gun
Although it is far from the conventional methods, it is the fastest (and coolest) method by far. You start by arranging the coals and concrete with the heat gun at the center. After a minute, you will see a red glow, indicating the coals have ignited.
Find the Best Charcoal Holder and Cast Iron Grill Accessories at CampMaid
Looking for the best grills for camping? CampMaid has got you covered! We’re an online store based in Utah, U.S., that sells cast iron camping sets such as our high-quality Dutch oven tools set that includes a Dutch oven stand and lid lifter. You can find all kinds of innovative camp kitchen equipment on our website! You can also find great recipes and reviews on our YouTube channel.
So what are you waiting for? Contact us for more details today. Alternatively, you can visit our website to place your order.
Dutch oven cooking is a technique that many people enjoy using because of its great results. This versatile cooking tool can be used for various cooking tasks. Its popularity is likely because it produces delicious dishes while retaining the nutrition and flavor of the fresh ingredients it is cooked with. This makes it a great option for busy families who want to eat healthy meals without spending a lot of time in the kitchen or for people who want to eat healthy on a camping or hiking trip without carrying heavy, bulky equipment.
Because cast iron Dutch ovens are such a useful and versatile piece of equipment, it is important to know how to use one properly to get the best results from your cooking. Read on for tips to help you make the most of your Dutch oven.
Choose the Right Dutch Oven For Your Needs
The first thing you need to decide when choosing a Dutch oven is what type you want. A round cast iron Dutch oven is great for basic cooking tasks and small meals. They're ideal for cooking and heating casseroles, stews, and other dishes that take a long time to cook and require some liquid to simmer. However, if you need your Dutch oven to accommodate larger quantities or different types of food, you may want to opt for a rectangular oven.
Cook Slowly on Low Flame
One of the biggest mistakes you can make when using a Dutch oven is overcooking your food. Slow cooking on low heat is the key to producing perfectly cooked food and tender meat when using this cooking method. Make sure to use the lid to cover the pot when cooking, as it will trap moisture, and your food will not dry out.
Feel Free to Use the Oven
Many people hesitate to use a regular oven when cooking with a Dutch oven. For long simmer dishes, you can transfer the Dutch oven to the oven to cook it gently over low heat and let it simmer until you're ready to serve your meal. It will make the meal more flavorful and tender.
Use Broth Instead of Water
Some recipes call for a large amount of water to be used in the cooking process, but this will make your food more watery and less flavorful. Instead, add a flavorful liquid to the dish to give it a better taste and extra moisture. Chicken broth is a great substitute for water in this recipe, and it will add plenty of flavor to your food.
At CampMaid, you can find a variety of camping cooking equipment, including a lodge lid lifter, portable charcoal grills, collapsible charcoal chimney, charcoal holder, cast-iron grill Dutch oven sets, kickstands, accessories, and more
Connect with us to learn more about our top sellers! You can also follow us on our Instagram, Facebook, or YouTube channel to stay updated about our innovative outdoor cooking solutions.
One thing most campers are commonly concerned about is smart packing.
Outdoor cooking is an essential part of every camping trip.
Going on a camping trip soon? Camping is a fun activity for many. More than 8 million people went camping in 2021. Households in the US are always looking for fun outdoor adventures.
If you’re stressed about your upcoming camping trip, we are here to help you. Our hacks will make your camping packing, meals, and activities much easier. Make sure to check out CampMaid for Outdoor Cooking Essentials.
Make Your Own Fire Starters
Making a fire starter will help you save money and time. It’s also a necessary outdoor skill. All you have to do is simply take some paper towels or old paper and tie them to your fire-starting log.
Get Glow Sticks
You can buy glow sticks online and use them for your midnight nature calls. You can tie a glowstick to your tent, and anytime you want to step outside at night, you will have the light from your glow sticks. Plus, the glow sticks also repel critters who might pay a visit.
Baby Wipes For the Win!
Baby wipes are not just for your baby. They are a must for any trip, including a campaign trip. Grab three to four packets, and you can clean just about anything with them. From utensils to your hands and face to your camping gear, they are hygienic, and with one swipe any surface will be instantly clean.
Scavenger Hunt
If you’re going camping with children, a great way to keep them busy is to engage them in an exciting scavenger hunt. This will help keep them distracted while you prepare the campsite. It will also give your kids a little space to explore. Just make sure they don’t wander off too far.
Food Prep
This hack will save you time and keep your campsite mess-free. Prepare your food before your camping trip. You can chop meat and veggies and store them in a mason jar or little baggies. You can also store some snacks in little Ziploc backs, and each individual can carry a bag with them. Make sure you also have some useful outdoor cooking equipment for camping.
Check Out CampMaid
If you’re looking for easy yet delicious camping meals, you can check out our recipes. At CampMaid, we have everything you need. Visit our website today for portable charcoal grills for camping, skillets, collapsible charcoal chimneys, charcoal holders, cast-iron grill accessories, and best dutch oven sets online.
Follow us on Instagram or Facebook to learn more about our upcoming products and exciting offers. Connect with us today as we continue towards our goal of revolutionizing the brilliant world of outdoor cooking equipment.